


Tilt Calculator
First Use
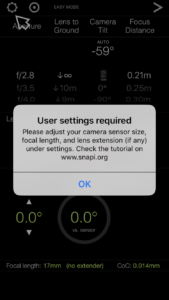
The first time you open Tilt Calculator, you are reminded to adjust its basic settings (sensor size, focal length, lens extender if any, measurement unit, circle of confusion). To do so, press the top leftmost button.
SETTINGS (Settings Screen)
The Settings screen allows to adjust the basic settings of Tilt Calculator. Turn each scroll wheel to adjust the following:
- The Focal Length of your lens
- The Focal Length Extender (if any) – this acts as a focal length multiplier
- The Camera Sensor/Film Size of your camera
The Circle of Confusion is calculated automatically as a function of the selected sensor size. You can also set it manually by pressing on ‘AUTO’. The Circle of Confusion (CoC) controls what is deemed acceptably sharp on the resulting photograph.
The length unit can be set to metric or imperial/US. To change it, press on ‘metric’ (or ‘imperial/US’). Note this does not affect the way the focal length, sensor size, and Circle of Confusion are displayed – these are always expressed using the metric system.
These settings are permanent (i.e. remain stored even when you leave the app) but can be reset at will.
Once happy with your settings, press the check button on the top right of the screen.
TILT CALCULATOR (Main Screen)
Tilt Calculator is a bespoke tool that does one main thing: it determines the amount of Lens Tilt you need to apply to set the ground in focus whilst taking your set-up as input; the ground may be anything so long as it is where the focus will be – the sea, a table, a beach, a hillside, a wall etc. Tilt Calculator was developed essentially with landscape photography in mind, but can be used for any situation e.g. product photography.
Tilt Calculator assumes you are familiar with the basic concepts of operation of a Tilt-Shift Lens, namely lens tilt, hinge line, plane of focus and wedge of acceptable focus. Reminders can be found at the bottom of this page. In addition, Tilt Calculator comes fitted with a number of informative (and interactive) blueprints that teach you the basics or simply refresh your memory.
The main screen of Tilt Calculator is organized into three main parts: TOP (Inputs), MIDDLE (Outputs I), BOTTOM (Outputs II), described hereafter. It also displays at the very bottom the set focal length and circle of confusion as well as a number of warning messages.
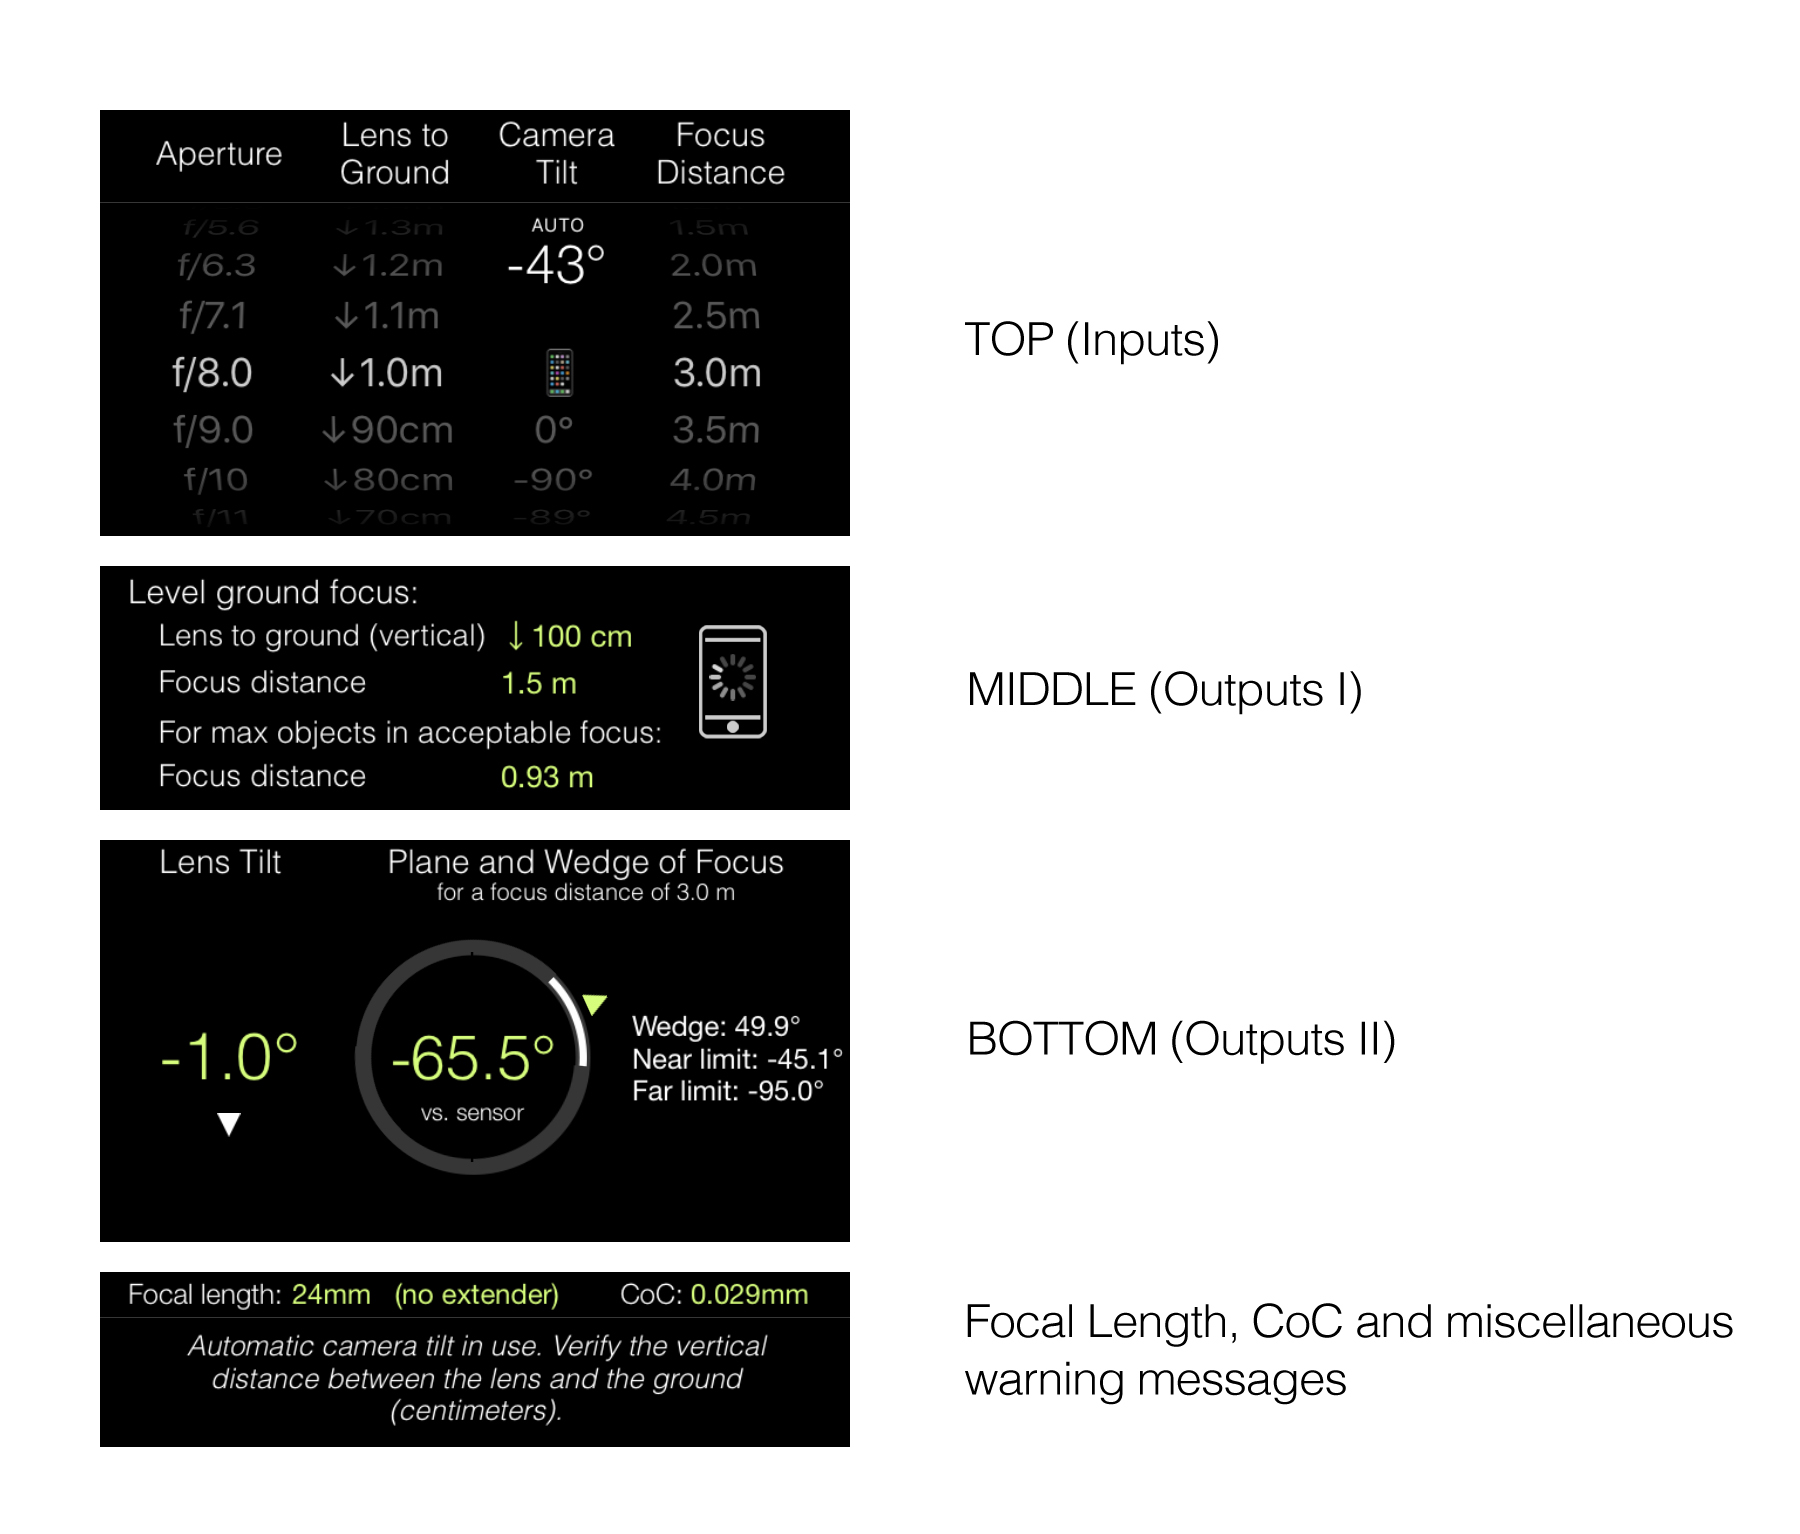
TOP (Inputs)
The TOP part consists of scroll wheels to adjust the Lens-to-ground Distance, the Camera Tilt (and Ground Angle), the Lens Aperture, and the Focus Distance.
The primary scroll-wheel inputs (besides the basic settings in the previous section) are inputs that directly influence the calculation of the lens tilt. The secondary scroll-wheel inputs are only used to visualize in the app the plane of focus and the wedge of acceptable focus; they have no effect on the calculated lens tilt.
- The Lens-to-Ground Distance (vertical): the vertical distance that separates the lens from the ground (where focus will be). Adjust the scroll wheel according to your set-up.
- The Camera Tilt: the tilt of your camera – do not confuse this with the lens tilt. The Camera Tilt is either measured automatically by Tilt Calculator or entered manually. Automatic measurement is done when the Camera Tilt scroll wheel is set to
 . See below for automatic measurement of the Camera Tilt.
 - The Ground Angle: it is set level i.e. 0º by default. To change it, scroll the Camera Tilt scroll wheel downwards until it displays ⏚ (and the label then changes to Ground Angle) – it is always measured automatically by Tilt Calculator. See below for automatic measurement of the Ground Angle.
- The Lens Aperture: The Lens Aperture affects the width of the Wedge of Acceptable Focus, similarly to how it affects the depth of field on a normal lens. The wider the aperture, the narrower the wedge of acceptable focus, and vice-versa. Set it to visualize the effect on the wedge of acceptable focus so you can adjust your lens properly. The Lens Aperture has no effect on the calculated lens tilt.
- The Focus Distance: The Focus Distance affects both the position of the Plane of Focus and that of the Wedge of Acceptable Focus. It also affects the width of the Wedge of Acceptable Focus for a given Lens Aperture – the shorter the Focus Distance, the narrower the Wedge of Acceptable Focus, and vice-versa. Set it to visualize its effect on the Plane of Focus and Wedge of Acceptable Focus. You can use this input e.g. to verify the recommended focus distances in the MIDDLE part of screen. The Focus Distance scroll wheel has no effect on the calculated lens tilt.
Automatic measurements of Camera Tilt and Ground Angle:
- Camera Tilt (): Scroll the Camera Tilt scroll wheel downwards until it shows . Then place your phone on the back of the body of your camera, either vertically or horizontally as best suits you. When the measurement is done, press the white iPhone button on the MIDDLE part of the screen. The measured Camera Tilt is then recorded and displayed in green.
- Ground Angle (⏚): Scroll the Camera Tilt scroll wheel downwards until it shows '⏚'. Then place your phone along the ground. When the measurement is done, press the white iPhone button on the MIDDLE part of the screen. The measured Ground Angle is then recorded and displayed in the MIDDLE part of the screen (x° ground focus). Thereafter turn the scroll wheel back to Camera Tilt (e.g. or manual value) to set the Camera Tilt – the Ground Angle is kept in memory. To reset the ground angle to being level (0°), turn the scroll wheel to Ground Angle (⏚) and then turn it to Camera Tilt (either automatic or manual).
IMPORTANT NOTE: always measure the Ground Angle before the Camera Tilt.
MIDDLE (Outputs I)
This first set of outputs provide the recommended focus distances to apply on your lens for setting the plane of focus and wedge of acceptable focus such that the ground and objects around it are in (acceptable) focus. Adjust your lens accordingly.
- The first recommended focus distance sets the plane of focus exactly on the ground (i.e the lower part of the wedge of acceptable focus is then below ground).
- The second recommended focus distance sets the lower part of the wedge of acceptable focus on the ground; this maximizes the number of objects in focus on and above the ground.
BOTTOM (Outputs II)
This second set of outputs indicates the calculated Lens Tilt to apply on your lens according to the above inputs (and settings) in order to obtain ground focus together with any of the recommended focus distances described above (MIDDLE part). Adjust your lens accordingly.
This part also displays the exact position of the Plane of Focus (green triangle) and of the wedge of acceptable focus (white arc) that correspond to the set focus distance. Remember that the Plane of Focus and the Wedge of Acceptable Focus intersect along the Hinge Line the position of which is set by the Lens Tilt. The angle of the Plane of Focus is by default measured against the camera sensor – you can also display it measured against the ground. To do so, simply press the indicated green Plane of Focus angle (-65.5° on this image).
BASICS
The hinge line is an imaginary line around which the plane of focus and wedge of acceptable focus rotate, hence the name “hinge”. The exact position of the hinge line is controlled by the lens tilt. The hinge line sits parallel to the axis of lens tilt. The more your lens is tilted the closer the hinge line is to your camera. The less your lens is tilted the further away the hinge line is to your camera. When your lens is not tilted, the hinge line is therefore situated at infinity, hence the plane of focus is parallel to your lens section i.e. it operates as a normal lens. When your lens is tilted downwards, the hinge line is situated below your camera.
The Plane of Focus is self-explanatory. It is the plane on which your lens achieves perfect focus. The plane of focus intersects the hinge line and rotates around it. The amount of rotation is controlled by the focus distance of your lens. The plane of focus is situated at most at a right angle (90º) vs. the camera sensor, when the focus distance is set to infinity. From this derives a very simple use of a Tilt-Shift Lens – with a level ground, and focus set to infinity, you can precisely adjust the lens tilt by slowly tilting (downwards) until the ground is in focus and voilà, done.
The Wedge of Acceptable Focus is also self-explanatory. It is the area within two planes expanding from the hinge line (and between which lies the plane of focus) within which your lens achieves acceptable focus. ‘Acceptable’ focus is determined as a function of the Circle of Confusion (see settings). The wider your lens aperture, the narrower the wedge of acceptable focus. Note the wedge of acceptable focus is also affected by the focus distance of your lens such that it reduces with the focus distance.
WORKFLOW (EASY mode)
Assuming you have set the basic settings of Tilt Calculator i.e. Focal Length, Lens Extender and Camera Sensor/Film Size, you then proceed as follows:
- Compose your image, with the camera lens preferably not tilted.
- Measure the vertical distance between your lens and the ground and set the Lens-to-Ground scroll wheel accordingly (closest value).
- If the ground is not level (horizontal), measure the Ground Angle using the automatic measurement in Tilt Calculator.
- Measure the Camera Tilt either automatically using the automatic measurement in Tilt Calculator, or manually (and if the latter, enter the Camera Tilt manually in the the App.
- Use the calculated Lens Tilt to adjust your lens accordingly.
- Set the aperture of your lens according to your preferred exposure time. Then input this aperture in Tilt Calculator.
- Adjust the focus distance of your lens according to one of the recommended focus distances in the MIDDLE part of the screen – use LiveView on your camera to adjust it finely. Preferably use the one for max. objects in acceptable focus, unless the ground consists e.g. of a clear surface like a body of water with objects below it that you would prefer in focus.
- You can verify the effect of the selected focus distance by turning the scroll wheel accordingly. Note the scroll wheel may not list all possible focus distances.
PRIVACY POLICY
Tilt Calculator only records locally on your device the settings needed to make the App work, namely:
- Permanent storage (i.e. data remain stored when leaving the App): Focal Length (and extender), Camera Sensor Size, Circle of Confusion, Length Unit (metric or imperial/US)
- Volatile storage (i.e. data are erased when leaving the App): Lens Aperture, Lens-to-Ground distance, Camera Tilt, Ground Angle and Focus Distance as well as all outputs (Lens Tilt, Plane of Focus, Wedge of Acceptable Focus, Recommended Focus Distances.
- None of your personal information is stored. The App also works fully offline and does not require or use any data connectivity except for sending in-app emails.
You have the possibility to email me directly from the App itself. Your communication remains strictly confidential, and none of the information you share with me is stored or shared with any third party. I do not either store any of your information.